Sunday, May 23, 2010
It's been a busy few weeks...
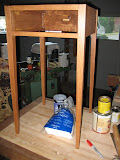
I've not updated in a while, but that doesn't mean I've not been busy. I've just not been busy in the garage. This weekend, however, I did get to put one coat of poly on my shaker table. Just 3 or 4 more to go!
Sunday, May 2, 2010
Why yes...
that is a Lie-Nielson #4 Smooth Plane on my workbench. And I am happy to see it. My dad and I took a 3.5 hour (one way) road trip to Highland Hardware today to see the Wood Whisperer and meet other guildies. We were both blown away by how many tools Highland has on hand. Not only that, they were all knowledgeable and very helpful. I wish I had this to clean up the stock for the shaker table. Well, now I do have it, and can't wait to put it to use.

Labels:
#4,
highland hardware,
Lie-Nielson,
Thewoodwhisperer
Wednesday, April 28, 2010
About that craftsmanship...
Finishing a piece of furniture is an art form. An art form, of which, I do not have a complete grasp. I stained the ash shaker table with Olympic Pecan stain. It went on easy with a cheap styrofoam brush. I used the blue Scott shop towels for wiping off the excess, a tip I learned from a Wood Whisperer interview with Michael Dresdner. What I didn't expect was it to dry so fast. Getting the excess stain off took some extra wiping. Overall, I'm happy with the result. You'll notice I didn't take much care staining the inside. There's a lot of glue spots & splotches. The legs are great, but...

Here is where my craftsmanship failed. As you can see there's tool marks from the planer. Hidden from the eye, that is until stain was applied. Notice the undulating pattern is somewhat spread out, which is probably why I didn't feel it with my bare hand. Next time, though, I know to do some extra hand planing before applying my stain.
Monday, April 26, 2010
Testing stain...
Just a quick update. I hand sanded the shaker table and took a leftover piece of ash and did some test staining. I drew a line down the middle of the board and shellaced one side. After the shellac dried I sanded with 400 grit and applied a cherry stain to both sides. On the back, I applied pecan stain to half, and golden maple to the other half. I plan on checking it tomorrow to see how it all looks. One of those stains will go on the table I'm sure.
Tuesday, April 20, 2010
Dropped drawer repair
In an attempt to repair the dropped drawer, I took the advice of some fellow woodworkers. I added a beveled edge to the drawer front. Now, I wanted the bevel smaller, but turns out the dent was larger than expected. It looks funny from the sides, but it's done now and I can't take it back.

Quick update...
Sanded the Shaker Table this weekend. Still trying to figure out what to apply for finish.
Sunday, April 11, 2010
Old school or new school?
When it came time to put the bevel on the underside of the top I had a choice. Table saw, or hand planes? I watched this Wood Whisperer video, in which he used both approaches. I had planned on using the table saw, but when I thought about the effort required to get everything setup I decided to give hand planes a shot. Wow, it was fast. I finished all 4 bevels in the time it would have taken me to setup the table saw.

I promised a pic of the dropped drawer corner. Here it is. Still working out how to fix this. You can see from the 2 pictures that it's in an awkward place.
Subscribe to:
Posts (Atom)


