On the bright side, looks like I may get some cedar for drying.
Tuesday, October 26, 2010
Sunday, June 20, 2010
Barn bench...
Wifey asked me to build a bench for the barn. After a couple of years, I finally got around to it. I did the angled cuts by hand using bow-saws just for the practice. the It took a half a day, and that includes the time to paint it. If I had used power tools for everything the build would've only take a couple of hours. You can find the plans on the Knockoff Wood site. Here's some pics of the bench waiting for someone to sit on it.
Sunday, June 6, 2010
Shaker Table completed
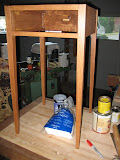
With the 3rd coat of polyurethane here's the completed shaker table. I used Minwax Satin Finish Polyurethane. The 3rd coat really made the table smooth to the touch. If the pictures look a little odd, it's because I used some Paint.Net magic to remove the background and only show the table.
Monday, May 31, 2010
I've not been slacking...
I promise. The past few weeks I've not posted about my woodworking. That doesn't mean I've not been working. I've been installing fans in my wife's barn. I was tasked with creating an arm that would support 4 fans around a 6"x6" post. There were very specific requirements that it be "neat". So, I crafted something I thought would work in Sketchup. It's an 8" arm that's secured with four 3" deck screws. The top of the fan is held at an angle with hay string, which can be found in abundance in a barn. Once the foreman approved the design I created a test piece to verify the design. I worried some about the arm not having a brace under it, but after testing it could almost hold my weight which is much more than a 5 lb fan.
Below is a pic of the Sketchup model, and then a pic of the finished product. Because of my efforts, roughly 30+ horses will stay cool this summer.
Sunday, May 23, 2010
It's been a busy few weeks...
I've not updated in a while, but that doesn't mean I've not been busy. I've just not been busy in the garage. This weekend, however, I did get to put one coat of poly on my shaker table. Just 3 or 4 more to go!
Sunday, May 2, 2010
Why yes...
that is a Lie-Nielson #4 Smooth Plane on my workbench. And I am happy to see it. My dad and I took a 3.5 hour (one way) road trip to Highland Hardware today to see the Wood Whisperer and meet other guildies. We were both blown away by how many tools Highland has on hand. Not only that, they were all knowledgeable and very helpful. I wish I had this to clean up the stock for the shaker table. Well, now I do have it, and can't wait to put it to use.
Labels:
#4,
highland hardware,
Lie-Nielson,
Thewoodwhisperer
Wednesday, April 28, 2010
About that craftsmanship...
Finishing a piece of furniture is an art form. An art form, of which, I do not have a complete grasp. I stained the ash shaker table with Olympic Pecan stain. It went on easy with a cheap styrofoam brush. I used the blue Scott shop towels for wiping off the excess, a tip I learned from a Wood Whisperer interview with Michael Dresdner. What I didn't expect was it to dry so fast. Getting the excess stain off took some extra wiping. Overall, I'm happy with the result. You'll notice I didn't take much care staining the inside. There's a lot of glue spots & splotches. The legs are great, but...
Here is where my craftsmanship failed. As you can see there's tool marks from the planer. Hidden from the eye, that is until stain was applied. Notice the undulating pattern is somewhat spread out, which is probably why I didn't feel it with my bare hand. Next time, though, I know to do some extra hand planing before applying my stain.
Monday, April 26, 2010
Testing stain...
Just a quick update. I hand sanded the shaker table and took a leftover piece of ash and did some test staining. I drew a line down the middle of the board and shellaced one side. After the shellac dried I sanded with 400 grit and applied a cherry stain to both sides. On the back, I applied pecan stain to half, and golden maple to the other half. I plan on checking it tomorrow to see how it all looks. One of those stains will go on the table I'm sure.
Tuesday, April 20, 2010
Dropped drawer repair
In an attempt to repair the dropped drawer, I took the advice of some fellow woodworkers. I added a beveled edge to the drawer front. Now, I wanted the bevel smaller, but turns out the dent was larger than expected. It looks funny from the sides, but it's done now and I can't take it back.
Quick update...
Sanded the Shaker Table this weekend. Still trying to figure out what to apply for finish.
Sunday, April 11, 2010
Old school or new school?
When it came time to put the bevel on the underside of the top I had a choice. Table saw, or hand planes? I watched this Wood Whisperer video, in which he used both approaches. I had planned on using the table saw, but when I thought about the effort required to get everything setup I decided to give hand planes a shot. Wow, it was fast. I finished all 4 bevels in the time it would have taken me to setup the table saw.
I promised a pic of the dropped drawer corner. Here it is. Still working out how to fix this. You can see from the 2 pictures that it's in an awkward place.
Wednesday, April 7, 2010
Sometimes the work is not the reward...
Quilt Rack
I've put in around 40 hours making a quilt rack for my sister-in-law and niece. That sounds like a lot of time, but it's not when you enjoy the work. One reason it took so long was because woodworking is my hobby. Like most hobbyist I get a few hours here and there to work on a project, which means I have to context switch each time I come back to the project. I like woodworking because, unlike developing software, I create tangible items. Something that a person with a history degree, the history majors I know wouldn't understand Dijkstra's Algorithm, can look at and understand. The building of the quilt rack was only part of the reward. The best part was seeing my sister-in-law's reaction when I gave it to her. Gifting in general is fun. When you can gift something that you created, that's where the real reward comes in.
- Sanding with 180 -> 220 grit
- 1lb cut spit-coat of shellac
- quick sanding with 220 grit
- stain with dark walnut stain
- swearing
- stain with dark red mahogany stain
- more swearing
- 1 coat of polyurethane
- sanding with 600 grit
- another coat of polyurethane
Shaker Table
I've been busy with the Shaker table build the past week. The task was to build the drawer and attach the drawer rails. I've cut half-blind dovetails before, with disastrous results. This time things went much smoother. The picture you see below is my bench vise. I'm thinking of patenting it. None of this "quick release" expensive screw vise stuff for me, no way. Counting the 2x4 I think I have a total of $20 in the vise. That said, I get about $5 worth of performance.
While my vise isn't ideal, I was able to layout the tails, and start sawing. I took my time and followed the sawing advice from Chris Schwarz's re-print of, and guide to "The Jointer and Cabinet Maker".
While my sawing techniques have drastically improved in the past weeks., my chiseling techniques have not. One problem, as I found out after finishing the drawer was that my chisels were extremely dull. Schwarz, at point in the book mentions (paraphrasing) "If your chisels compress the fibers of the end grain it's time to sharpen". Yup it's time to sharpen.
Two things are not pictured in this update.
1. The bent corner of the drawer front where I dropped it
2. The top being cradled by clamps for glue up.
When I find the camera, which I put in a "safe" place, I'll post pics.
Saturday, March 20, 2010
Shaker table aprons, dry fit, tapered legs...
Quick update on the weekend's progress. I finished all mortise and tenons for the legs and aprons and conducted a dry fit. Some of the mortises were a little loose, but I think they'll still work. In all I am proud of the way the table is coming together so far.
Once I knew everything was looking ok, I decided it was time to taper the legs. To do that easily I needed to build a tapering jig. So I did. I leveraged the idea from The Woodwhisperer's Guild tapering jig video. The difference is that Marc used a rail to guide his jig, where I just used the fence. It worked well for me. In all the excitement, I forgot to take a picture of the tapered legs. Hopefully, I'll have the glue up done soon, and I'll post a pic then.
Sunday, March 14, 2010
Mortise & Tenons & Craftsmanship...
I have been practicing my craftsmanship. I am not saying that I am at the craftsman level, just stating the fact that I am making an effort.I took my time today milling the rails and cutting the mortise & tenons. I was rewarded with a decent fit, and only one goof. The wood for the aprons and rails seems to be sap wood, where the wood for the legs was heartwood. I am curious as to the affect this will have when it comes time for finishing. If any of my 4 readers have had experience with heartwood/sapwood differences with staining Ash, feel free to comment. Hey, comment even if you don't have experience. The grain on the aprons was also wilder than the legs, which led to some pretty bad tearout when jointing. I was able to hide the tearout on the inside of the rails, so it is not an issue.
The time I spent paring out the mortises and tenons flew by. My mind was clear and focused on the job at hand. I wonder, if I were persuing woodworking as a professional craft and not a hobby, would have a similar experience? I can "zone out" when developing software, that is if it is fun, interesting or new. I guess when you are woodworking for a living, it has the danger of ending up like any other profession. Some tasks you look forward to tackling, and the others are just tasks. I wonder which tasks fall into which category. I have a ways to go before I am a "craftsman". I consider myself an "apprentice". As an apprentice, one of my duties is sharpening tools. That's a good thing, because the Ash has been brutal on my chisels.
Saturday, March 13, 2010
Dirty Harry said it best...
"A man's gotta know his limitations". That's true. One of my many limitations is the ability, or lack thereof, to mill a piece of wood square. Sure, I follow the steps, joint the adjacent sides, rip against the freshly jointed face, plane faces. The wood just never comes out square. The problem with that is this; If you don't start with a square board then you can never expect to get a square piece of furniture. Today, my milling abilities got a little better.
I started the morning by laying out the legs for the shaker table. I've never worked with Ash before, but it seems to work similar to Oak. Cutting the 2" board on my table saw made me realize it's time to put on the WoodWorker II that I got for Christmas. I used my #5 and #7 to knock off the burn marks from the saw, and the ridges from the jointer. After getting the legs squared up I tried to find the best grain for the front and back legs. The wood provided in the Bell Forest is very good. Straight grained and it looks like it all came from the same part of the tree. After selecting the legs I marked out the mortise for the side aprons. I used my drill press and a 3/8" bit to hog out most of the material. Then I went back with my chisels and pared out the rest of the material.
When hand planing the makeshift legs for my workbench started racking. I found a piece of dimensional 4x4 laying in the garage and clamped it to the legs. I drew a red arrow on the picture for clarity. Amazingly, this made it feel like a workbench instead of a tabletop on a set of saw horses. There's still some movement, but it's 100% better than before.
All in all, it was a pretty productive day. Got a decent start on the shaker table, and even threw a coat of shellac on the quilt rack. I'm getting the hang of milling stock square. Just don't bring your Starrett to my garage.
Saturday, March 6, 2010
Roundover done
Quilt rack dry fit
Sunday, February 28, 2010
Ready to roundover the edges
So I decided to give the repair a shot. I'm glad I did. Now, I know that it's not an astonishing fix, and that it's kinda rough around the edges, but it's my first repair for this kind of thing. This is the best side, the other side will be covered by the rails. I plan on using some wood putty to fill the cracks, so I'll get to learn from that too. I spent the rest of the morning shaping the sides with the sander and disc sanded everything.
Saturday, February 27, 2010
Measure twice cut once FAIL
You know the saying "Measure twice cut once"? Yeah me too. Thing is, you have to make sure the reference that you're measuring from is the correct line. As you can see, when I overlay one side on the other, the 3/4" mortise for the second side is off by half the mortise. But only for the 2 side-by-side mortises. So, do I scrap the entire side or try to repair the mortises?
Subscribe to:
Posts (Atom)