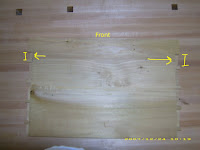
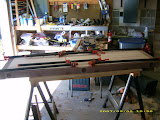
I spent part of yesterday, and most of today getting the rabbets in the top, bottom and sides. I used my router and router fence attachment to make the rabbets. I also learned how my joining sucks. There were a few peaks and valleys where I had edge joined the boards. I need to do a better job of making sure the boards are joined and faced properly.
I glued up the back panel and let it dry, while I went to Lowe's to get some finishing supplies. When I got back I used my Random Orbital Sander (ROS) to sand all the pieces. I think it's finally ready to glue-up. My only question now is, do I finish it before glueing or after? I don't know either. Time to hit the forums.
Sunday, December 30, 2007
Friday, December 28, 2007
TS-3650 review...
I just published my 1 year TS-3650 review. You can read it by following the link in the "Reviews" section to the right.
Thursday, December 27, 2007
Porter Cable router
I got to use my new Porter Cable 690 router. I cut a stop dado in the sides of the cabinet to hold the bottom. My dad gave me a Skil router a year or so ago. He said he didn't need it anymore. It works for what I had used it for in the past, but it was time to upgrade. It's true that my PC router is fixed base, but I plan on getting a plunge base soon enough. The difference between the two routers is amazing. After I had made the dado with the PC I looked at the Skil and literally thought, "FAIL". Hence the pic.
Krenov style cabinet...
I've gotten a couple of questions about my "Krenov style cabinet". Mainly, "what is a Krenov style cabinet?" I was introduced to James Krenov through an episode of "Wood Works". David Marks' interview with Krenov was interesting. Mr. Krenov's cabinets are, in my opinion, artistic yet functional. The cabinets seemed to have a simplistic quality to them, although they aren't simplistic at all. Krenov pays very close attention to detail. Now, I'm sure my poplar cabinet won't come close to comparison with Krenov's, but this is a training exercise. I want to have a few more pieces under my belt before I tackle a project for someone else. Anyway, the walnut for my workbench legs hasn't come in yet, so I have time.
A little more about Krenov:
I've read "A Cabinetmaker's Notebook". I was able to ignore Krenov's grumpiness and enjoy the book. He has an interesting way of approaching his work. I loaned the book to a friend and he couldn't finish it. He disliked Krenov's "old man attitude", even though Krenov wasn't that old of a man when he wrote the book. Some folks on the woodworking and luthier forums I frequent have a deep dislike of Krenov. Not his work, just his attitude. He does have the grumpy old man attitude, but he also produces some gorgeous work. Not only is he known for his cabinets, but also his hand planes. Do some Google searches for Krenov. I think you'll find his work appealing.
Monday, December 24, 2007
... and then I notced the mistake.
Here's some pics of the dovetails. Each side... if you look closely at the pics of the dovetails you'll see the problem. Just in case you didn't notice, I put an annotated pic up. Seems that somewhere between cutting the dovetails on the first side and starting the second I lost track of which side was which. Oh well. At least you can't tell from looking at the front.
Finished up the dovetails...
Sunday, December 23, 2007
Started the Krenov cabinet...
I finally felt industrious enough to start the Krenov cabinet.
I decided to use poplar since I had gotten 1/2" stock. The only power tool I have used so far is the table saw.
I used it to cut the boards to final dimension. I joined the boards by hand using my #7.
After joining the edges I face planed the boards. Apparently, I finally got my plane tuned up right. I was able to make some almost transparent shavings.
I glued up a 3/4" piece for the top of the cabinet. I plan on having a gradual ra We'll see how that goes. While my panel was gluing, I cut the dovetails in the topWhen I finished dimensioning all of the stock, Idius. of the sides. They didn't turn out as good as I wanted, but oh well. By the time I had the talis cut and cleaned up it the panel was ready to come out of the clamps. I decided to go with half blind dovetails for the top. I started cutting them and got one side done before stopping for the day. You can see in one pic on the top where I had a knot blow-out while chiseling. I knew the knot was there but I took a chance and failed miserably. Hopefully, if I can get up early enough tomorrow I can cut the other side of the half-blind and do a test
fit of top & sides.
Thursday, December 20, 2007
Reclaimed mahogany...
Last night I cut a piece of the mahogany to try and plane. I used my #5 and cleaned the face on a piece about 18" long. A hand plane is not the best way to clean paint off of a board. I see a lot of sharpening in my future. There was a bout 1/16" to 1/8" of marine paint the board. The mahogany underneath was preserved by the paint. Oh W-O-W. It was awesome. Straight grained mahogany that would be perfect for a piece of furniture. I can't wait to figure out a project to use it on. Maybe my Krenov cabinet? Dunno.
Sunday, December 16, 2007
Oh yeah...
... I picked up some of that mahogany. It's got about 1/16" or more marine paint on it. Hopefully that preserved it and there's some good looking wood underneath. I got a few boards just to play with. I'll make a few swipes with my #5 and see how it looks.
Pop's place...
I visited my grandfather Sunday. Luckily, I caught him at the beginning of a project. He's been asked to replace the stock on this old shotgun. We can't tell if it's Japanese or Chinese writing on the gun, but it's definately not English. Anyway, I told him I was going to take pictures of his progress. Here you can see he has his rough length marked out on a piece of 8/4 walnut.
Me: "Is there anything special about the grain orientation?"
Pop: "Oh yeah, the stock has to be in the long grain direction" [Like you see in the picture]
Me: "Oh I see, that way the long grain takes the shock of firing."
Pop: "Yup, if it were cross-grain it would split."
I made sure to get a picture of the checkering. Pop likes checkering gun stocks. The past few haven't had checkering, but this one does. He's pumped, my words not his, to get to do the checkering.
So, I'll update the progress he makes on this gunstock.
And yes, that is Jedi Kleenex.
Me: "Is there anything special about the grain orientation?"
Pop: "Oh yeah, the stock has to be in the long grain direction" [Like you see in the picture]
Me: "Oh I see, that way the long grain takes the shock of firing."
Pop: "Yup, if it were cross-grain it would split."
I made sure to get a picture of the checkering. Pop likes checkering gun stocks. The past few haven't had checkering, but this one does. He's pumped, my words not his, to get to do the checkering.
So, I'll update the progress he makes on this gunstock.
And yes, that is Jedi Kleenex.
Saturday, December 15, 2007
Some lumber...
I've been wanting to make a Krenov style cabinet. Nothing big. The thing is all of my current poplar lumber was 3/4" S4S. That's a little thick for a Krenov cabinet. And, I still haven't finished repairing the flat spots on my bandsaw tires. So, no re-saw capability, not that a 10" bandsaw has resaw capability. I made a trip out to the lumber yard and found some 1/2" S4S poplar boards that are 9" wide. I bought two of them and brought them home in the Ridgeline. Now, all I have to do is get to work!
Thursday, December 13, 2007
Reviews...
I've had a review of the RIGID TS-3650 laying around dormant since March. A lot of people ask about this table saw. So, I created a review of the setup. I plan on writing another review on the performance of this saw. If you've read this blog, you already know I like it and have put it through it's paces. Check the new review section on the right for more details.
Sunday, December 9, 2007
Ohhhh yeah...
... the ball bearings came in. They worked great. Unfortunately, the tires that the blade rests on have "flat spots" on them. So when the blade is feeding through the guides it moves left to right about 1/4". That ain't good. So, the band-saw remains in pieces until I can get replacement tires.
I flattened a board today. 4 sides, by hand. Maybe 1/64" out of flat. That's pretty good. The edges were square to the faces as well. I was pretty proud.
Talking with Pop...
I went to my grandfather's house today and hung out with him for a while. We got to talking about guitars & woodworking, as usual, and I asked him about the lumber in the top of his barn.
Me: "What is that painted lumber in the top of the barn?"
Pop: "That's all mahogany! One inch thick. Came off the bottom of a bunch of boats."
Me: "All of that is mahogany?"
Pop: "You need to get it. I'll never use it. Get it, it's good stuff, just be sure to check it for screw before you plane it."
Me: "uhh.. OK!"
So, apparently, I have come into some re-claimed mahogany. My guesstimate is it's 100 to 200 bft. It's been in the top of the barn since I was a kid. I know it's been there at least 15-20 years.
He also told me about a bunch of pine in the barn. I knew it was there, I've seen it a hundred times. Turns out it's pine from my grandparents land. There's probably 500 bft. Some of it was infested with worms, so it has the worm trails. I remember that pine being in there when I was a little kid. I know it's 25 years old. All air dried! Wow. He told me to come and get what I wanted, " 'cause I ain't gonna every use it."
wow.
Friday, December 7, 2007
Band saw bearings...
... have not come in yet. I went to a couple of places around town but they would only sell to businesses. Then I found one company that would sell "... to anyone with money." So, I ordered a couple of bearings Wednesday. The little buggers were expensive at $13 a piece. Hopefully, they will come in today and I can complete my band-saw tune up tomorrow. The poor little band-saw, in so many pieces. Pics if I have time.
Wednesday, December 5, 2007
Retro project...
I play around with music some. I have a small home recording setup. The mixer I use never felt right.
The angle of my hand felt weird. So I deciced to put it in some sort of caddy. Well, I figured why not practice some joinery while I was at it. The front is dovetailed and the back is just a half lap. There are 2 runners, almost
like drawer rails, that hold the mixer at an angle. The back is low cut for wires to come out of the mixer.
I made "The Ramp" out of red oak from one of the Borgs. The finish is just some Minwax stain and that's it. I did this over a year ago when I was totally new to woodworking. I had no idea what I was doing. I think I had read 3 months of Fine Woodworking before trying this.
Saturday, December 1, 2007
Bandsaw...
So I watched the Wood Whisperer episode on band-saw setup and tuning. So, I decided to try and tune up my 10" Rockwell. Yeah, the wheels were WAY out of plane, by about a 1/2", so I fixed that. I also replaced the steel guide blocks. I read an article that rated "Cool Blocks" as really good, but they're around $15. That same article said that if you had some hard maple laying around you could make your own. Well I had hard maple. I made 2 blocks for the top guides and left the steel bottom guides. The top thrust bearing was fine, but the bottom had seized up and had a groove the size of the blade. So I need to get a new thrust bearing before I finish tuning.
Planing technique....
As I mentioned before, I read an article on surface planing boards. I've never had luck planing a board by hand, but I decided to follow the advice in the article. Wow, what a difference. I was able to flatten the board out with only about 1/64" of deviation lengthwise. Yeah, it was a 2' piece of poplar and I was using a freshly sharpened blade. But still, it was an achievement for me. While I was at it I jointed one edge. Ended up being able to get the edge and the face square. All that wanting a power planer... pfffftt! Ok, that's a little too far. Being able to do it by hand is cool though.
Got lumber?
I decided to take a trip to a local sawyer this morning. He's about 30 minutes away, so I stopped at a coffee shop on the way and read a Woodworker's Journal article on surfacing boards with a hand plane. Hmmm... more about that later. After my morning refreshment I went to the sawyer's place and talked to him about lumber & furniture, etc. I told him I was looking for maple and walnut for my workbench legs. He said he had plenty of 4/4 and some 5/4 but nothing thicker. I told him I didn't want to use select grade walnut for workbench legs. I think that gave him an impression that I wasn't just throwing some boards together. He then told me he had 3 or 4 walnut logs ready to process, and that he would cut out the legs for me if I could use them "wet". We got to talking, and I've read in various places, for things like workbench legs it probably won't make too much of a difference. Even old chairs had the stiles wet and the rails dry. That way when the stiles dried out and came into equilibrium they would shrink around the rails' tenon, making an extremely tight joint. So, he took my name, number, rough dimensions I wanted. He then told me he'd give me a call when he cut up the pieces.
Thursday, November 29, 2007
Got halfway through...
I only got to read half of "Workbenches". It is very well written, and very informative. Schwarz's writing is like listening to a friend describing his experiences with workbenches. Schwarz states upfront that this book is different from the other workbench books, and he is right! Schwarz tells you what he likes, and doesn't like about all aspects of a workbench. The man should know, I believe he stated he as built 10 over the years. I couldn't imagine. It's taken me a year to build 1!
Wednesday, November 28, 2007
The Workbenches book....
just arrived at my desk. It's got a huge dent in the side of it. Thanks USPS, you suck. I didn't realize it was hardcover. It's a very nice book, autographed even. I'm firing up the included CD-Rom right now. I'll report back later on it. It'll be difficult to get work done today with this book at my desk. I'll probably have the whole thing read by tonight.
Sunday, November 25, 2007
Saturday, November 24, 2007
Spent some time in the garage...
Bought a vacuum bag for my Rigid 14 gallon vac. From what I've read on forums and read on podcasts, using the filter alone will allow dust into the motor. So, I bought a bag, and a new filter. Now the vac is ready for catching dust.
I sharpened all of my plane blades. Working that hard maple & walnut dinged up the edges pretty good. I re-beveled them and honed up the edge. They're now sharp enough to shave the hair on my arm. If you're wondering, I use the Scary Sharp method. I tried some oil stones, and they work pretty well. I like scary sharp better.
Friday, November 23, 2007
Just ordered Christopher Schwarz's book...
I have both of the "workbench" books. When I saw that Christopher Schwarz wrote a book on workbenches I knew I had to get it. I could have bought it off Amazon, or even Barnes & Noble for almost $10 cheaper. Instead I bought it off of Christopher's site, for two reasons. Firts, it comes with a CD that contains the book and drawings. Second, it's autographed.
If you've never checked out Christopher's blog, I have it in my Links section. I recommend checking it out.
Tuesday, November 20, 2007
In da garage...
I made it into the garage today to do some woodwork. Unfortunately, it wasn't for me, it was for a friend. I'm cutting angles on MDF boards for him. He's building a speaker box for the storage well in the back of his Corvette. I don't mind doing simple things for friends. But I HATE MDF.
Monday, November 19, 2007
Retro project...
Sunday, November 18, 2007
... the search continues.
I found some walnut for the legs. 16/4 hit or miss. I found enough to make the legs. Unfortunately, it was $9.90 bft. WHOA! I know walnut comes at a premium... $9.90 bft for S2S hit or miss!? I figure I want about 27 bft. So, $9.90 x 27 = $267.3, before tax! I'm going to try to start calling some lumber yards in Nashville. I've went there before for lumber, so maybe I can get lucky again.
Powered by ScribeFire.
Thursday, November 15, 2007
All your base...
I've been scouring a radius of 90 miles trying to find wood for the base of this thing. I'm want maple, poplar or hickory. The thing is I can hardly find rough lumber big enough to get a 4"x4"x42" dimensioned piece. Let me retract that statement. I've found both hard maple and poplar that would do, but I ain't paying almost $250 for it. Only one local distributor has it and they charge a premium. The search continues.
Ends leveled...
I have leveled off the ends of the bench, and patched a terrible piece of tearout. But that's a post when I feel like reliving the experience. No pics yet. I'll try to post some soon.
Ready to level the ends...
Time to glue up!
Dry fit...
Mortis'...
I need to cut the mortise for the spline of the breadboard end. The end on the left was cut first with my router. I didn't like the way it came out, so I decide to cut the mortise on the other by hand. Unfortunately, I do not have a mortising chisel. I used my Irwin/Blue Marples paring chisels to cut the mortise on the right. The dimensions of the mortise on the left is 13/16" w x 18"l x 3/4" d. The mortise on the right is 13/16" x 4" x 1/2"d. Notice the difference in dimensions there? Yeah, took me 30 minutes to do the mortise on the right. I broke the Colt back out to finish it up. Well worth it.
Now it's time to square up the ends. Well... mostly square, cause I'm not perfecct. Yet. The bench at this point weighs at least 100 lbs. I tried cutting the ends by hand, but I made a real mess of one of the ends. Fortunately, I had left plenty of material for mistakes.
1. I setup two rollers on the right side of the blade with 2 2x4s. One 6' and one 8'.
2. I made a simple outfeed table out of a sawhorse to support the top at the end of the cut.
3. I screwed a piece of maple that fit in the t-slot to the underside of the bench top. I recovered the maple strip from a failed cross-cut sled.
4. I sawed away.
You can see from the burn marks that I had a difficult time on the first end. The maple did a pretty good job of holding the top straight but I didn't do a good job of pushing. The second end came out almost free of marks.
Did I mention that thing was heavy?
Ready for the ends...
So, now I'm ready to put on the breadboard ends. Why breadboard? Well... the maple pieces are face glued. So, if I just glued the walnut ends on it would be an end grain (maple) to long grain (walnut) butt joint. If you're a new woodworker, this is a big no-no. So, I'm going with breadboard end. If you need more information on breadboard ends... goto any of the woodworking forums and do a search in the archives. I promise you someone has already explained what they are, the benefits, and detriments of their use.
The Wood Whisperer...
I watch The Wood Whisperer (see link in the links bar) video podcast. Marc is great at getting concepts across in a manner that us weekend garage woodworkers can understand. Last night I watched his "live feed" and participated in the live chat. Got a couple of questions answered and I think for the finish on my workbench I'm going with BLO (boiled linseed oil) mixed with a little varnish. Of course, I'll try a test piece to see how it goes, but I'm thinking it'll do a good job of bringing out the contrast between the walnut and maple.
Wednesday, November 14, 2007
almost... flat....
Flattening...
Trim time...
Top ready to flatten...
The clamps come off! There's a lot of glue squeeze out, which I think is
good. I started in with the scrub plane and worked my way up to a #80 cabinet scraper. My triceps are now the size of Hulk Hogan's.
In hindsight I wish I had put a clamping caul across the top of the sections to keep the boards aligned vertically. Of course, I was using all the jigs I had, so I plane.
Subscribe to:
Posts (Atom)